Showing posts with label Cookies. Show all posts

Thursday, May 12, 2011

The Chewy

*Arggghh. Blogspot screwed up. Reposting this*

What happens when you have to get rid of your expiring bread flour and your dough hooker is down.

You make cookies!

Am a big fan of Alton Brown. Yes, I like geeks. A cooking/baking geek is even more appealing. If you have not watched his shows before, he basically explains how science works in cooking/baking. That's enough to get me swooning.

And err, if you're going to google on how he looks...don't expect a good looking dude like Chuck Hughes.

Gooey in the middle, crispy on the edges. Could be more more chewy, but not complaining. Cookie's a little too tall for my liking, was aiming for the flat slappy kind like Subway. No overnight chilling or any of that 24-36 hour chilling-in-fridge marathon which I like.

The Chewy turned out more popular than I think they were. One intern at Mom's workplace asked if they're Subway cookies. Mom said, nope, it's my daughter's No-Way cookies.

Am submitting this entry to Aspiring Bakers #7 - Chocolate Delight (May 2011).

The Chewy (adapted from Alton Brown's Good Eats)
Makes 17 cookies using my #40 disher & halving the recipe. Recipe shown below is the original recipe. Makes 30.

Ingredients:
227g unsalted butter
360g bread flour
1 tsp kosher salt
1 tsp baking soda
50g sugar
270g brown sugar
1 egg
1 egg yolk
2 tbsp milk
1 1/2 tsp vanilla extract
340g semisweet chocolate chips

Method:
1. Heat oven to 190°C.
2. Melt the butter in a heavy-bottom medium saucepan over low heat. Sift together the flour, salt, and baking soda and set aside.
3. Pour the melted butter in the mixer's work bowl. Add the sugar and brown sugar. Cream the butter and sugars on medium speed.
4. Add the egg, yolk, 2 tablespoons milk and vanilla extract and mix until well combined. Slowly incorporate the flour mixture until thoroughly combined.
5. Stir in the chocolate chips.
6. Chill the dough, then scoop (#20 disher) onto parchment-lined baking sheets, 6 cookies per sheet. Bake for 14 minutes or until golden brown, checking the cookies after 5 minutes. Rotate the baking sheet for even browning. Cool completely and store in an airtight container.

Wednesday, January 12, 2011

Cashew Nut Cookies

I know it's strange but I'm actually not a big fan of Chinese New Year snacks despite having a sweet tooth. Not into bak gwa or any candy as well. But wanted to bake something festive just to feel like I'm part of the celebrations hahah! Am submitting this entry to Aspiring Bakers #3: My Favorite CNY Cookie (Jan 2011).

Was kinda grinning to myself when I packed the cookies in the jars, as they look similar to those which are commercially sold. These buttery melt-in-your-mouth cookies are packed with rich cashew nut flavor and are delicious. My only qualm is they can be tad sweeter, will add more sugar in the future. 恭喜发财!!

Cashew Nut Cookies (adapted from My Kitchen Snippets)

Ingredients:
250g all purpose flour
60g corn flour
1/2 tsp baking powder
210g butter (I use unsalted)
100g powdered sugar (to increase to 120g)
1 egg yolk
1/2 tsp vanilla essence
200g ground cashew nuts
1 egg (beaten for eggwash)
Extra cashew nuts, cut into halves for decoration

Method:
1. Pre-heat oven to 180 °C. Sift all the dry ingredients and set aside.
2. Cream butter with powder sugar until light. Add in egg yolk and vanilla essence. Mix well.
3. Stir in the dry ingredients and ground cashew nuts. Mix well. Chill dough in fridge for 40 min.
4. Shape the dough into small balls (11g for me) or roll it out and cut into desire shapes. Arrange on a lined baking tray. Brush with beaten egg and place half cashew nut on top of cookies and press slightly to flatten it.
5. Bake for 15 mins (16 mins for me) or until it is nicely brown. Cool and keep in airtight container.
Saturday, December 25, 2010

Peppermint Mocha Blossoms

It's Christmas! My celebration, if you call that 'celebration', was pretty simple yet blissful. Spent the afternoon baking, then had dinner with boyfriend at Sizzler's then some shopping at Phoon Huat and Popular and home sweet home. Both of us are not keen in crowd squeezing with the mass in town.

Boyfriend helped me out with the afternoon baking, he had the all-important role of unwrapping the peppermint kisses and QC if they were intact. And for those which were not, he also assisted in the elimination of them, i.e. eat them :D

I know I've swore off cookies baking but these cookies are too cute to miss, especially during this festive season. It's simple yet the results are rewarding. First the cookies are so adorable, great for gift giving and parties. Secondly, the recipe is versatile, you can swop the Hersheys kisses on top for different flavors and adjust your cookie recipe accordingly. Lastly (my favorite reason), pressing down the kisses onto the puffy cookies were so fun! +100 stats to the fun element. You have to watch out for the mashy kisses after cooling the cookies to room temperature though. I put them into the fridge to harden them up again before serving.

These cookies are awesome!!! These are like the cookie form of Starbucks' Peppermint Mocha. Blend of rich chocolate, stimulating coffee and refreshing peppermint. The creamy and smooth peppermint kiss in the middle is like a surprise when you hit the middle of the puffy cookie. My mom was so fond of them that she instructed me to reserve more for her instead of giving them all away at a Xmas BBQ I'm going to later. I'm already looking forward to making them one more time before the year ends.

Am submitting this entry to Aspiring Bakers #2: Christmas! (Dec 2010). And not forgetting, Merry Christmas to everyone and your family! :D
Peppermint Mocha Blossoms (adapted from My Kitchen Addiction)
(makes approximately 24 cookies)

Ingredients:
113g unsalted butter, softened
150g granulated sugar
1 tbsp instant espresso powder
1 egg
1/2 tsp pure vanilla extract
1/2 tsp peppermint extract
210g all purpose flour
15g cocoa powder
1/2 tsp baking soda
1/4 tsp salt
25g granulated sugar to coat cookies
24 Hersheys Peppermint Kisses

Method:
1. Preheat oven to 190°C. Lightly grease your baking sheets, or line with parchment and set aside.
2. In a large mixing bowl, cream together butter, sugar and espresso powder until light and fluffy.
3. Beat in eggs, one at a time, and then add the vanilla and peppermint extracts.
4. Meanwhile, whisk together flour, cocoa powder, baking soda and salt in a separate bowl.
5. Gradually add the flour mixture into the creamed mixture until the dough comes together.
6. Roll tablespoons of the dough into balls (23g for me) and coat with granulated sugar. Place onto baking sheet and bake for 9-10 mins.
7. Let the cookies cool on the baking sheet for 2 to 3 mins before pressing a Hersheys Kiss into the centre of each cookie. Transfer to wire racks to cool completely.

Thursday, December 9, 2010

White Chocolate Macadamia Nut Cookies II

Other than baking, I have another passion, and that's running. One of my new year resolutions for 2010 is to complete a half marathon under the timing of 2h 30mins, then a full marathon under 6h 30mins. For the half marathons, I clocked 2h 11mins on Sundown and 2h 19mins for AHM, which was like double YAY! for me. And 5 December was a day that I'll remember for life haha, as I ran my first 42.195km on Standard Chartered Marathon!

The experience is crazyyyyyy. At the start of the 30th km, we were led to this depressing construction site near Marina Barrage. By the 32km, I started to walk because my knees were starting to hurt from the stress. And by 34km, I was going half walking and half jogging already. My feet started to swell and my running shoes got so tight that I had to stop halfway to adjust the laces. By 38km, I couldn't run anymore. Was limping towards the finishing line. LOL Managed to do a 5h 45mins despite all the trauma. Had no issues with the stamina, it's just my legs - it was too painful to run!

Was also touched by all the support I've gotten for the run. Bumped into an old friend of mine while running through the East Coast Park stretch and he actually waited for me during the last dash at Padang and cheered me on. Boyfriend also waited a good hour for me under the blazing sun at my company's sponsored tent. He said he thought he should come an hour in advance in case I finish faster than expected. Silly boy has so much faith in me HAHAHAH!!
Can't expect too glam a shot when your knees are threatening to give way any moment

After the run, I couldn't walk properly - was staggering like a penguin. Haven't had post-run symptoms before, but a full marathon is really insane. Don't think I'll put my legs through the trauma again. It's more of a I've-done-it-before! kind of experience.

Anyway, here comes the cookies which I'm supposed to be blogging about hehe. These are actually made from the same cookie recipe as my previous batch as I was still practising on my Project: Cookies. As usual they turned out chewy. The combination of white chocolate and macadamia nuts is a match made in heaven. Sweet creamy smooth white chocolate complemented by subtle buttery macadamia nuts, along with chewy cookie. Reallyreally good, imo.
White Chocolate Macadamia Nut Cookies (modified from Dorie Greenspan's Baking: From My Home to Yours)
(makes abt 90 cookies for me)

Ingredients:
280g all purpose flour
1 tsp salt (1 1/4tsp if you really like salt)
3/4 tsp baking soda
225 butter, room temperature
200g sugar
160g light brown sugar
2 tsp pure vanilla extract
2 large eggs
200g white chocolate chips
150g finely chopped macadamia

Method:
1. Preheat oven to 190°C. Line parchment paper on baking trays
2. Whisk together flour, cocoa powder, salt and baking soda
3. In another bowl, with a stand mixer or hand mixer, beat the butter until smooth for abt 1 min on medium speed
4. Add in the sugars and beat for abt 2 mins or so until well blended
5. Beat in the vanilla
6. Add in eggs one at a time, beating for 1 min before the next one goes in
7. Reduce mixer to low speed and add in dry ingredients by 3 portions, mixing only until each addition is incorporated
8. On low speed, or by hand with a rubber spatula, mix in the chocolate and nuts
9. Spoon the dough by slightly rounded tablespoonfuls onto the baking sheets, leaving about 2 inches between spoonfuls
10. Bake the cookies for 10-12 minutes (15g @ 8.5mins for me), or until they are brown at the edges and golden in the centre
11. Pull the sheet from the oven and allow the cookies to rest for 1 minute, then carefully, using a wide metal spatula, transfer them to racks to cool to room temperature...profit!

Saturday, December 4, 2010

Chocolate Chip Cookies III

Remember I mentioned Project: Brownies earlier on? Change of plans. We decided to abandon ship and go for Project: Cookies instead. So this is a test recipe I'm doing for my team. And similarly (and hopefully, keeping fingers crossed), if all goes well, it'll come to something at year end.

This is the trusty base recipe I've used before. It's so versatile that I'm basically just throwing in whatever addons I have in the house. I've also made them smaller so I can save on the baking time, but do feel free to do drop bigger dollops of cookie dough to make bigger, even more chewy cookies. And yes I like chewy cookies - think Subway, but boyfriend prefers crunchy ones, any recipes to recommend?Chocolate Chip Cookies (adapted from Dorie Greenspan's Baking: From My Home to Yours)

Ingredients:
280g all purpose flour
1 tsp salt (1 1/4tsp if you really like salt)
3/4 tsp baking soda
225 butter, room temperature
200g sugar
145g light brown sugar
2 tsp pure vanilla extract
2 large eggs
340g bittersweet chocolate, chopped into chips, or 340g store-bought chocolate chips or chunks

Method:
1. Preheat oven to 190°C. Line parchment paper on baking trays
2. Whisk together flour, cocoa powder, salt and baking soda
3. In another bowl, with a stand mixer or hand mixer, beat the butter until smooth for abt 1 min on medium speed
4. Add in the sugars and beat for abt 2 mins or so until well blended
5. Beat in the vanilla
6. Add in eggs one at a time, beating for 1 min before the next one goes in
7. Reduce mixer to low speed and add in dry ingredients by 3 portions, mixing only until each addition is incorporated
8. On low speed, or by hand with a rubber spatula, mix in the chocolate chips
9. Spoon the dough by slightly rounded tablespoonfuls (mine were smaller at 10g each) onto the baking sheets, leaving about 2 inches between spoonfuls
10. Bake the cookies for 10-12 minutes, or until they are brown at the edges and golden in the centre
11. Pull the sheet from the oven and allow the cookies to rest for 1 minute, then carefully, using a wide metal spatula, transfer them to racks to cool to room temperature...profit!

Friday, October 15, 2010

Cocoa Chocolate Chip Cookies

I saw someone I knew reading a Dan Brown book. I asked, "You're Christian?" He said "Ya." I thought "Christians and Dan Brown don't go too well together". He laughed and said "I like him, do you like reading?". "No I like baking." And he said he want to try my cookies...and made further jokes that he wants to try them when he calls me up again. Well I don't know why people instinctively associate baking with cookies, and I know he's just kidding, but yeah he'll get his cookies.

I thought it would be a good excuse to make some cookies since I have a request now. I'm kinda lazy to make them as they always get too messy for me, getting sticky cookie dough all over my fingers. Competing against the warm humid weather in our tropical island to keep the dough intact is no simple feat. I had to keep dunking the cookie dough back into the freezer to sit for a while before working on them again.

Added a twist to the classic chocolate chip cookie - cocoa! These cookies are wickedly chocolatey. Caught whiffs of cocoa when my nose edges near them during the shooting. The chocolate chips stretches the chocolatey goodness even further. They're crispy on the edges and soft and chewy in the centre. The pecans provide another nutty dimension to the cookies as well. I like how my sister went, "Do you think I'll get a sore throat eating these?" I said "Yeah." and she pops one into her mouth anyway. Good job. I stored 2 portions of the cookie dough in the fridge so that I'll have fresh cookies from the oven whenever I crave for them.
Cocoa Chocolate Chip Cookies (adapted from Dorie Greenspan's Baking: From My Home to Yours)
(makes 45 cookies)

Ingredients
175g all purpose flour
70g unsweetened cocoa powder
1 tsp salt (1 1/4tsp if you really like salt)
3/4 tsp baking soda
225 butter, room temperature
200g sugar
160g light brown sugar
2 tsp pure vanilla extract
2 large eggs
340g bittersweet chocolate, chopped into chips, or 340g store-bought chocolate chips or chunks
100g finely chopped walnuts or pecans (I toasted them before chopping)

Method
1. Preheat oven to 190°C. Line parchment paper on baking trays
2. Whisk together flour, cocoa powder, salt and baking soda
3. In another bowl, with a stand mixer or hand mixer, beat the butter until smooth for abt 1 min on medium speed
4. Add in the sugars and beat for abt 2 mins or so until well blended
5. Beat in the vanilla
6. Add in eggs one at a time, beating for 1 min before the next one goes in
7. Reduce mixer to low speed and add in dry ingredients by 3 portions, mixing only until each addition is incorporated
8. On low speed, or by hand with a rubber spatula, mix in the chocolate and nuts
9. Spoon the dough by slightly rounded tablespoonfuls onto the baking sheets, leaving about 2 inches between spoonfuls
10. Bake the cookies for 10-12 minutes, or until they are brown at the edges and golden in the centre
11. Pull the sheet from the oven and allow the cookies to rest for 1 minute, then carefully, using a wide metal spatula, transfer them to racks to cool to room temperature...profit!

Tuesday, September 7, 2010

Green Tea Sablés

The closure to my can of almost-expiring matcha powder went to this recipe. I've never eaten nor seen a sablé before but that seems like a good recipe to burn my matcha powder, and the reviews for this particular recipe are good. Sablés is a classic French butter cookie which originates from Normandy, France. The name "Sablés" is French for "sand", describing the sandy texture of the cookie.

Googled for its pronunciation - we know how French words always sound so different from the spelling - it's pronounced as 'Sah-Bleh", sounds classy LOL. I can imagine myself going around offering the green cookies to everyone, and they gonna ask, "What are these?" And I'll take a deep breath and look oh-so-poetic and go, "Sah-Bleeeeh~"The thought of that intrigues me.

True to its name, the cookie is sandy and crumbly, enriched with the smoothness of butter. The granulated sugar rolled onto the side also contributed to the sandiness. The green tea fragrance is intense enough for me, make sure you use good quality matcha powder though. As you can see, I don't have the best rolling and slicing skills in the world, but they still look cute enough to be given away as little gifts for people :D
Green Tea Sablés (adapted from Keiko Ishida's Okashi)

Ingredients:
240g pastry flour, chilled
15g matcha powder
150g unsalted butter, room temperature
130g icing sugar (I use 122g because that's all I've left :Þ)
pinch of salt
2 egg yolks
Granulated sugar for rolling on

Method:
1. Sift flour and matcha powder twice and set aside
2. Beat butter, icing sugar and salt until soft and creamy
3. Add in egg yolks and mix well
4. Fold in flour mixture with a spatula
5. Cover the dough with plastic wrap and chill in refrigerator for about 15mins
6. Divide dough into 2 and shape them into logs about 3.5cm in diameter
7. Wrap the logs with parchment paper and refrigerate them until firm (I use shrink wrap instead and placed them in the freezer instead as I was running short of time)
8. Preheat oven to 150°C
9. Cut logs into 7mm thick slices and dip the edges into granulated sugar
10. Bake for about 25 mins and transfer to rack to cool completely

P.S. Damn I had a colleague went, "What are these?! Wasabi cookies?!" xD

Monday, August 23, 2010

Chocolate Chip Cookies II

Chocolate chip cookie lovers are like promiscuous lovers, they like not only one cookie. You can never count on just one chocolate chip cookie recipe. So here I go heeheee!!! Was inspired to make them after watching this video on one of my most-referred to cookbooks, Ready for Dessert. Looks so gooooooood on the video. Going to digress a little, have to share why I adore him so much! Other than being a great dessert chef, he writes well and has an interesting personality. You gotta read his blog and maybe, his twitter to know what I mean :D

The cookie dough log rolling was tedious for me. The whole chunk of cookie dough was too soft and sloppy due to our warm weather. Looked totally different from what he has in the video. Had difficulty rolling them and made a mess in the kitchen. Got smarter with the 2nd log and decided to shrink wrap the piece of dough and slowly maneuver it into a log.

After cleaning up the kitchen...my lazybones signaled me that I should be more interested to do drop cookies from now on. If you like a cripsy cookie with soft interior coupled with generous serving of (very) gooey chocolate and crunchy nuts, this cookie is for you.

Chocolate Chip Cookies (adapted from David Lebovitz's Ready for Dessert)
makes 25 cookies

Ingredients
175g all purpose flour
3/8 tsp baking soda (odd I know, I halved the recipe, that's why xD)
Pinch of salt
110g butter, room temperature
105g light brown sugar
70g brown sugar
1/2 tsp vanilla extract
1 egg
110g nuts, toasted and coarsely chopped (I use pecans)
200g semisweet chocolate chunks (I use Valrhona Equatoriale 55%)

Method
1. Whisk together flour, baking soda and salt
2. In a separate bowl, beat butter, sugars and vanilla until just smooth
3. Add in beaten egg and mix well
4. Stir in flour mixture to butter mixture, then add in nuts and chocolate
5. On a lightly floured surface, divide the dough into 2 and shaped them into 23cm logs
6. Shrink wrap them and store in fridge for 24h
7. Preheat oven to 175°C
7. Slice dough to 2cm thick and place them on baking sheets
8. Bake for 10 mins and transfer to wire rack to cool

Saturday, August 7, 2010

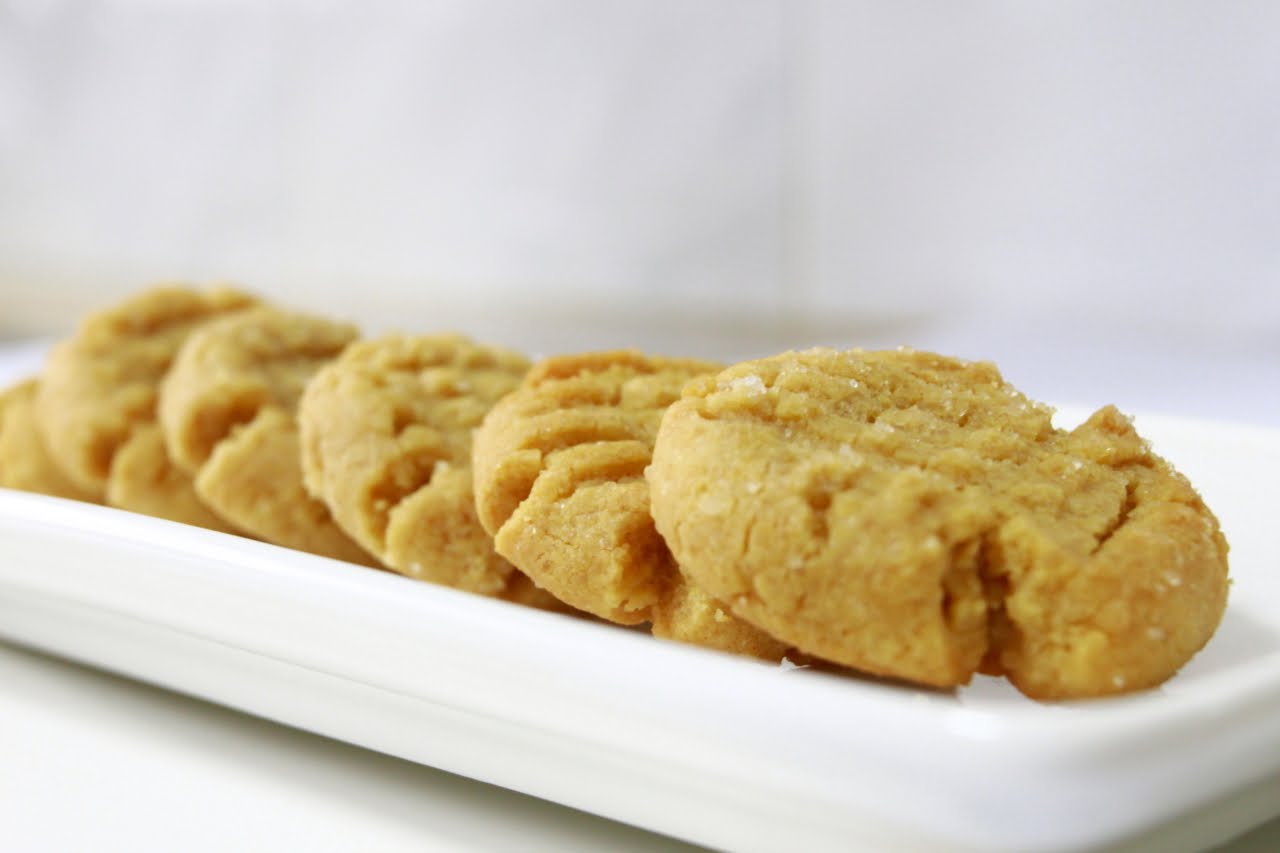
Peanut Butter Cookies

Tried out David Lebovitz's Peanut Butter Cookies from his cookbook, Ready for Dessert. My previous attempts at peanut butter cookies ain't so successful because it's so tough playing with peanut butter! It either ends up too dry or if you incorporate more butter to tackle the dryness, it ends up lacking of the nutty taste. His recipe counter-ed the problem by using melted instead of room temperature butter. Omg so smart lol

He also suggested rolling the cookie dough on granulated sugar before baking. The result is a crunchy cookie with chewy centre. Love the occasional crunch I get from the freshly rolled on sugar before baking. I thought that that is really ingenious. There's so much punch in each cookie that it literally feels like eating peanut butter in a cookie form. Great for peanut butter lovers. But I'm not so crazy over peanut butter, this is just one of the to-do items in my baking list =p

The only thing is the recipe states that it yields 30 cookies and despite following the instructions closely to make 1 inch-ed size dough for each cookie. I ended up with a 75-strong army of peanut butter cookies. No harm having more though haaaa! Am also kinda happy that my cookies look pretty to similar to what he has posted on his facebook heehee!!

Peanut Butter Cookies (adapted from David Lebovitz's Peanut Butter Cookies)

Ingredients:
175g all purpose flour
115g unsalted butter, melted
260g creamy peanut butter
100g white sugar, more for rolling before baking
120g brown sugar
1 egg
1 tbsp baking powder
1/4 tsp salt

Method:
1. Whisk together flour, baking powder and salt
2. Cream white and brown sugar, melted butter and peanut butter in hand mixer until smooth
3. Beat in egg and mix well
4. Add flour mixture to wet mixture and mix until dough just comes together
5. Chill cookie dough overnight
7. Let dough come to room temperature
8. Preheat oven to 175°C
9. Pinch dough to make 1 inch sized balls and roll in granulated sugar before flattening it with a fork to make criss cross pattern
10. Bake for 9-10 mins and transfer to wire rack to cool...and profittttt!!! xD

Sunday, August 1, 2010

Butter Cookies with Chocolate Royal Icing

Had a birthday celebration last night. Pretty tough job making something for the birthday girl who is very (I'm-not-kidding-you) picky about food. Peanut butter? Nope. Almonds? Nope, she does not eat nuts at all. Fruit bars/squares? Too adventurous. White chocolate? Maybe too sweet. Chocolate chip cookie? Nah, I've made it for another 2 friends from the same group just recently.

Had to settle for butter cookies, a pretty safe (I think) snack which most people will eat. Butter cookie recipe is from Happy Home Baking. Not sure why the cookies look great on her blog but quite trashy on mine. Must be my inconsistent oven temperature hahha Kinda regretted using my bunny cookie cutter, of all cutters I own. The ears were flimsy and threatened to fall off any moment when I peel them off the shrink wrap to transfer to the baking tray. The tips of the ears also browned faster than the rest. Decorated the cookies with some facial expressions and chocolate royal icing for the bunny nose, which will hopefully entice her into eating them lol

Made royal icing for the first time and made a mess in the kitchen. Was dead beat from work in the morning and the mess I made in the kitchen from making the icing. Washed my dishes halfway and went to my room, plonk-ed onto the bed and asked my bf if he could help me with the dishes. And he did so with no hesitation. I must be the luckiest girl. :]

Chocolate Royal Icing

Ingredients:
150g icing sugar
25g cocoa powder
1 egg white

Method:
1. Sift icing sugar & cocoa powder
2. Beat egg until slightly frothy, gradually add in sugar mixture and beat the shit out of it

Tuesday, July 20, 2010

White Chocolate Macadamia Nut Cookies

Gonna celebrate 2 of my friends' birthdays tomorrow. Decided to make cookies for them as birthday presents! Reused my Anna Olson's recipe, modified a little to reduce the fat and sugar content with minimal effect on the result. This time I also divided the cookie dough into two and added white chocolate and macadamia nuts to one portion, and milk chocolate to the other.

Decided to use chopped chocolate bar for the milk chocolate portion because I have this bar of baking chocolate lying around since I started baking few months ago. Was dumb and bought random chocolates which labeled "for baking" without considering the percentage of cocoa hahahha It actually gave a pretty good result because the chocolates are chopped coarsely so it gave a generous dosage per bite which melted nicely on the tongue. The chocolate shavings which came off from the bar during the slicing also gave the cookie a rustic look.

For the white chocolate portion, am pretty pleased that I didn't burn them this time. My previous 2 attempts baking them at the typical cookie baking temperature burnt the white chocolate chips and the appearance wasn't too....appealing.

Looks like I need a bigger cooling rack :/

Birthday Cookies! (adapted from Anna Olson's Chewy Chocolate Chip Cookie recipe)

Ingredients
140g all purpose flour
75g butter, room temperature
20g white sugar
85g brown sugar
1 tsp vanilla extract
1/2 egg
1/2 tsp baking soda
1/4 tsp salt
1 tsp corn flour
50g white chocolate chips
40g macadamia nuts

Method
1. Preheat oven to 175°C
2. Cream sugar and butter
3. Add in beaten egg and mix well, then add in vanilla extract
4. In a separate bowl, combine flour, baking soda and salt, mix well
5. Add flour mixture to wet mixture and fold in till well combined
6. Stir in chocolate chips & nuts
7. Drop tablespoons full of cookie dough onto aluminium prepared trays
8. Bake for 10 mins and transfer to wire rack to cool...and profittttt!!! xD

Saturday, July 10, 2010

Chocolate Chip Cookies I

Am constantly in search of the recipe for the perfect chocolate chip cookie to realise there's none. Everyone has their own definition of a great cookie. Some like it crispy, some like it with a massive chocolate chip invasion, some like it soft and chewy. I like it chewy! But bf likes it crispy and crunchy, think: Famous Amos, which till this day, I'm still figuring out how -_- Hey I guess it's famous for a reason ya.

Decided to give my favorite chef a shot at her recipe and not disappointed at all! It gives the melt-in-your-mouth kind of texture, yet chewy at the same time. Not as chewy as the ones I had from Subway though, but still great.

Didn't listen to Ms Anna's instructions to bake it at a slightly lower temperature than most cookie recipes, and tried one batch with +10°C baking temperature and ended up with puffy cookies, probably due to the baking soda. Puffy ain't my kind of cookies hurhur. Did a little modification by reducing the sugar by a teeny weeny bit, will reduce a little more butter and just a bit of sugar in my next try, for health reasons ahahaha! Will probably give Alton Brown's recipe a shot the next time. hmm.
Anna Olson's Chewy Chocolate Chip Cookie

Ingredients
280g all purpose flour
170g butter, room temperature
40g white sugar
200g brown sugar
2 tsp vanilla extract
1 egg
1 tsp baking soda
1/2 tsp salt
2 tsp corn flour
180g semisweet chocolate chips

Method
1. Preheat oven to 175°C
2. Cream sugar and butter
3. Add in beaten egg and mix well, then add in vanilla extract
4. In a separate bowl, combine flour, baking soda and salt, mix well
5. Add flour mixture to wet mixture and fold in till well combined
6. Stir in chocolate chips
7. Drop tablespoons full of cookie dough onto aluminium prepared trays
8. Bake for 10 mins and transfer to wire rack to cool...and profittttt!!! xD